What Floor Finish Is and How It Actually Wears
Commercial floor finish, often called wax, is a clear polymer coating applied to vinyl composite tile (VCT), terrazzo, or other resilient surfaces. This finish creates a glossy, protective layer that resists dirt and scuffs. The shine is what tenants and customers notice, but underneath, the finish acts as a sacrificial wear layer.
Over time, grit and foot traffic abrade the surface. Mop heads and auto scrubbers remove some soil, but also scratch the top coat. Black heel marks, dull areas, and traffic lanes show where the finish is thinning. Cleaning chemicals and spills can soften or discolor the coating. The wear is gradual, but eventually the floor loses gloss and becomes harder to clean.
Most floors in busy spaces never wear evenly. Entrances, elevator lobbies, and restrooms lose finish faster, while corners and under furniture may still have multiple coats. Not all damage is visible. If the top coat gets thin enough, the underlying tile stains and absorbs soil, making restoration harder.
Keep reading: Seven Disinfecting Mistakes That Violate the EPA Label
The Full Strip: Steps, Chemicals, Machine Time and Neutral Rinse
Step-by-Step Breakdown
Stripping is a full removal of all finish, down to bare tile. Most teams start by clearing and dust mopping the area, then applying a high-pH stripper mixed with water. The solution sits for 5 to 10 minutes, softening the old finish. Some areas with embedded dirt or thick buildup may need a double application or extra dwell time.
Machine Scrubbing
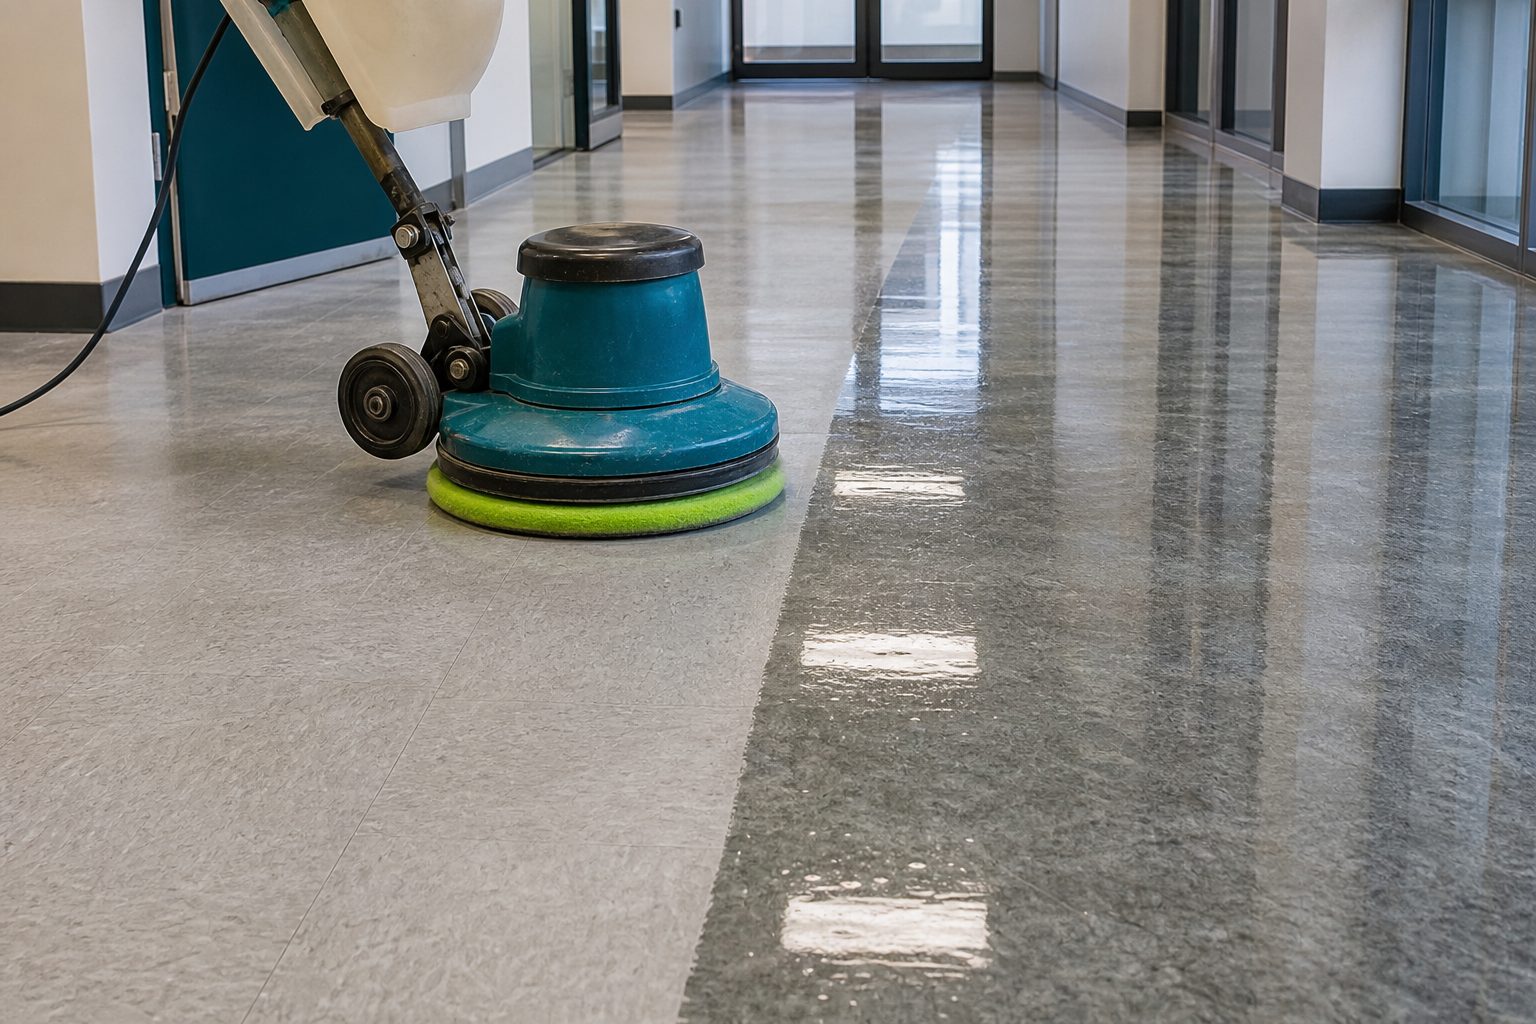
A low-speed floor machine with a black or brown stripping pad is standard. The pad, rotating at about 175 RPM, agitates the softened finish. Crews work in overlapping passes, adding more stripper as needed to keep the floor wet. Edges and corners require hand scrubbing or a doodlebug pad. Wet vacuums pick up the slurry, which contains dissolved finish, old soil, and chemicals.
Neutralizing Rinse
After stripping, the floor is slippery and alkaline. It must be rinsed with clean water, usually two or three times, to remove residue. Some companies use a neutralizing cleaner to bring the pH back to safe levels. Any leftover stripper can interfere with new finish adhesion, so this step is critical.
Drying and Recoating
The floor must dry completely before recoating. Fans speed up the process, but in humid buildings, this can still take an hour or more. Most specs call for three to five coats of new finish, with drying time between each. Only then do you move furniture back and reopen the space.
The Scrub and Recoat: Pads, Passes and Number of Coats
Surface Prep
Scrub and recoat skips the harsh chemicals. The process starts with a thorough dust mop, then an auto scrubber or low-speed machine with a blue, green, or maroon pad. The goal is to remove surface soil and the topmost layer of finish, not strip down to bare tile.
Crews use a neutral or mildly alkaline cleaner. The pad scuffs the surface enough to let new finish bond, but avoids gouging the tile. Corners, baseboards, and under desks may need hand work if traffic is heavy in those areas.
Recoating Procedure
After rinsing and drying, the floor gets one to three fresh coats of finish. Each coat dries in twenty to forty minutes, depending on humidity and air flow. The process is faster than a full strip. Most jobs finish in a half day, and furniture can often be moved back in less than three hours.
Keep reading: OSHA Hazard Communication for a Small Cleaning Crew
Labor Hours and Material Cost Per Thousand Square Feet
Strip and Refinish
Stripping takes more time, more workers, and more chemical. For one thousand square feet, expect a two-person crew to spend about three to four labor hours, sometimes more if the finish is built up or the floor is uneven. Most of that time is spent on machine passes, detail work, rinsing, and waiting for coats to dry.
Stripper is sold by the gallon and diluted for use. A typical job uses around one to two gallons of concentrate per thousand square feet. Finish is applied at about two to three coats, sometimes more for high gloss. Pads and mop heads used for stripping are usually single-use due to heavy soiling. The shop also pays for neutralizer, wet vacuum bags, gloves, and shoe covers, which add up over larger jobs.
Scrub and Recoat
Scrub and recoat uses less labor. One thousand square feet can be done by a single worker in about one to two hours, depending on the number of coats. The main expense is finish, since only one to three coats are applied after minimal surface prep. Fewer pads are used, and less chemical is needed since strong stripper is not required.
Material costs are primarily the finish itself and some neutral cleaner. Pads may be reused if not badly worn. The total cost, including labor and materials, can be less than half that of a full strip for the same area, depending on local wages and supply prices.
Downtime, Odor and Scheduling Around the Tenant
Disruption and Access
Full stripping produces more odor and requires longer closure. Stripper fumes can linger, especially in poorly ventilated spaces. Even low-odor strippers have a chemical smell. The area is inaccessible until all coats dry and furniture is replaced, which can mean overnight or weekend work in offices and retail spaces.
Scrub and recoat has far less odor. The area can often be reopened in three to four hours, and in some cases, half the floor can be done at a time to keep partial access for tenants. For property managers, this is a major advantage in busy buildings where downtime means lost revenue or inconvenience for occupants.
Tenant Sensitivities
Medical offices, schools, and residential buildings may have strict rules about chemical exposure or after-hours access. Scrub and recoat is easier to schedule during daylight or between tenant appointments. Some facilities require advance notice for stripping and will not allow it during regular business hours.
See how MopRoute handles this for commercial cleaning
Reading the Floor: Signs a Recoat Will Not Hold
Adhesion and Contamination Problems
Not all floors are candidates for a simple recoat. If the finish is badly embedded with soil, if there are deep scratches, or if there are multiple layers of old finish trapping dirt, a scrub and recoat may not bond properly. Milky or hazy patches can appear where embedded grime prevents adhesion. Wax build-up along edges or under desks is a red flag.
Some floors have had incompatible products layered over the years: acrylic over urethane, or vice versa. In these cases, even a well-prepped surface may peel or flake. Floors exposed to grease, oils, or certain disinfectants may also resist new finish. In these situations, a full strip is needed to restore the surface and ensure the new finish bonds.
Simple Field Tests
Experienced techs do a water drop test: a bead of water on the scrubbed surface should spread evenly, not bead up. A sticky or greasy feel after scrubbing means contamination remains. If a small test patch of new finish dries unevenly, a full strip is likely required. Visual inspection under good light reveals swirl marks, embedded black lines, and cloudy spots that tell you whether a recoat will last or fail quickly.
Building a Multi Year Floor Care Cycle Into the Contract
Both strip and refinish and scrub and recoat have a place in a long-term maintenance plan. The best approach is to alternate frequent recoats with less frequent full strips. For example, many contractors recommend scrub and recoat every three to six months for heavy traffic areas, with a full strip scheduled once every one to three years depending on wear and cleaning habits.
A written service plan sets expectations for tenants and property managers. It outlines the number of visits, the downtime required, and what each service includes. This helps control costs, prevents disputes, and keeps the floor looking presentable year-round. Seasonal events, tenant moves, and construction projects can be built into the schedule to minimize disruption and maximize value.
Tracking which properties have been serviced, when, and what procedures were used is essential when managing multiple sites. Systems that offer route scheduling, per-property checklists, and photo verification of completion give operators a way to document work, plan ahead, and avoid missed steps. For companies juggling several buildings, this kind of tool reduces mistakes and helps maintain professional standards across every account.